Cut Your Own Hair: An Easy Step-By-Step Layered Cut Guide
Table Of Content
Using both personal experience and third-party research, the team brings a unique perspective to their writing that might even feel like your hairstylist is talking to you themselves. If you want an easier (but less precise) method than what we described above, you can make a ponytail on the crown of your head. Then, place a hair tie towards the end of your ponytail and snip off the hair horizontally. You’ll want to start by holding out your hair at a 90-degree angle from your head to ensure your hair is even. Then, trim your layers according to the length and angle you mapped out earlier.
Get more helpful tips and answers to frequently-asked questions
In most cases, you’ll want to prepare your hair for layering by parting it in the middle. That way, you’ll cut even layers on either side of your head, and you’ll have the flexibility to style your hair in many different ways. You’ll want to work with a clean head of hair when cutting layers. Otherwise, grease and dirt could interfere with the quality of your cut. Layers are a timeless look that gives your hair a chic and professional style. And believe it or not, you can easily do this style yourself right at home—no previous training or experience required.
How to Cut Your Own Layers — Using a Ponytail
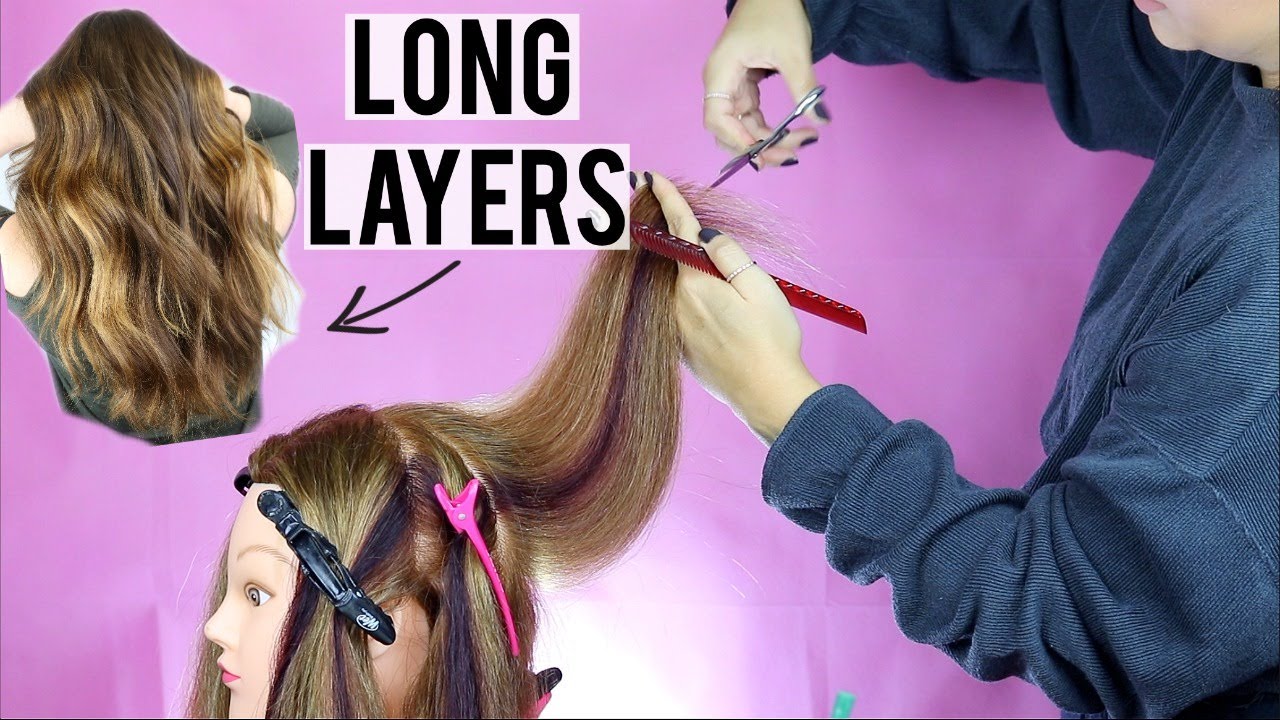
Use your cutting comb to direct all the hair forward, over your face, and pinch out one tiny subsection at a time, each beneath the other. Taking small subsections and a gentle approach with this cutting method will give you the most control over what you're doing as a beginner. For this particular cut, I suggest a method called slide cutting. Slide cutting is a gentle approach that enables flexibility and less room for error.
Step 3. CUT: Straight across the end
Once you gather hair in the center of your head where the crown starts to round, comb the hair forward. Then spiral the front-most portion of your hair into a twist and hold it in place with a clip. If they don't organically mesh well together, you may have some corners to eliminate or soften up. I am not a fan of a U-shaped haircut, so to avoid this, I first used point cutting to trim my ends on both sides directly across. Then, I blended my newly trimmed ends into my new face-framing layers, using point cutting to soften the point between those two lengths. Check to see that there aren't any major differences between each side.
What angle should I cut my hair for layers?
Cutting layers in short hair requires a detailed plan to maximize your success. There’s little room for error, given that you’re already working with a short head of hair. Therefore, we recommend taking a photo of yourself with your hair down and combed. First, use the fine tooth end of your cutting comb to bring forward a small quarter-inch section of hair from each side of your natural parting. Carefully bring that down to your starting point, pull it out slightly so you can view what you're doing more accurately, and gently glide your shears down the hair.
This gives them a visual for where the layers will begin,” Sara explains. If you like to toss your hair around or switch up your parting frequently, settle on a center parting. Once you've identified and cleaned up your parting, use the edge of your cutting comb to section your hair from about half an inch behind the ears. Going slightly past the ear line should give you a bit from the back length so that you're cutting to meet the longest point of the hair. Comb the hair forward and use your clips to section off the rest of the hair. This YouTuber shares her trimming technique for her gorgeous natural locks.
My face shape is square, and for best results, I typically like front layers to accentuate my cheekbones. Whether you want to go short or add layers, follow these pro tips. Dull edges on household scissors could potentially give you even more split ends (plus, ew, cross-contamination).

Now that you've got the basics down, we've rounded up the best instructional videos below to help you cut your own hair at home, no matter what kind of cut you're looking for. Assess your hair from both a vertical and horizontal perspective to catch any stray pieces that need trimming. The good news is if you really mess up, hair grows 0.5 – 1.7 centimeters per month. So, you’ll soon have an opportunity to redo your layers again. At this point, you may also need to use the spray bottle to keep your hair damp. Feel free to get creative with your back layers, adding a few different lengths.
Finish your cut by trimming any areas that stick out.
But, with the help of a good pair of shears and the sectioning of your hair, you’ll be able to create a salon-like layered style in no time. For visual learners, it might help to watch a few YouTube tutorials before beginning. According to PopSugar, "choppy layers" are back in style for 2021, so it makes sense that you would want to hop on this trend for a new 'do in the new year. As the professionals explain, the first step in attempting a choppy look or face-framing layers is to invest in a pair of hair-cutting shears. That means those scissors in the sewing basket won't make the cut. You will also need a cutting comb, cape, well-lit mirror, hair clips, and a blow dryer, which can all be found at your local beauty supplies store or online.
The key is to start small with a few careful snips — and to go slow. You can always take more hair off, but you can't add back what you've already chopped! If you're cutting your hair while it's wet, remember it will look even shorter once it dries, so snip with extreme caution. In fact, if your strands are curly or you're wavy-haired, only cut your hair when it's dry so you can get a better idea of what the final look will be. If you have straight hair, you can cut while it's wet or dampen it with a spray bottle first to get the cleanest, sharpest lines possible. Making layers in short hair requires planning, practice, and patience.
TikTok Users Are Cutting Their Ponytails Off to Create DIY Shag Haircuts - Allure
TikTok Users Are Cutting Their Ponytails Off to Create DIY Shag Haircuts.
Posted: Wed, 19 May 2021 07:00:00 GMT [source]
Remember, we're going for a perfectly imperfect look, but there should still be some obvious symmetry. You might find one side feels more challenging, so take your time. This is a moment to go back in and slide cut or point cut any uneven pieces. Use slide cutting to adjust your length and point cutting to adjust your overall shape. Now that you've made a loose face-framing shape, we will use point cutting to fine-tune our layers.
A good rule of thumb is to start your shortest layer below the earlobe or jawline, depending on the length of your hair. You may even want to begin your layers at the shoulder if you have long hair. However, keep in mind that your hair will shrink after it dries. Research shows that layers in hair help give people personal expression as well as them being an indication of regional trends.
You will not be closing or dragging your shears but sliding, cutting your way down the hair. Keep reading for more thorough instructions on how to slide cut properly. You should angle the short layers at the top of your head at a 135 – 180-degree angle. As you move down to the longer layers at the sides, it’s okay to cut them at 90 degrees. However, you should use point cutting to blend these sharper layers into your hair.
If you’d like to learn more about hair care, check out our in-depth interview with Ambia Elms. That means half your hair will fall to the right and the other half to the left. After you get out of the shower, use a wide-toothed comb to work through the tangles. Then, take a towel and gently squeeze the water out of your hair.
The 10 Best Short Hairstyles For Your Face Shape - Haircuts - Glam
The 10 Best Short Hairstyles For Your Face Shape - Haircuts.
Posted: Fri, 19 May 2023 07:00:00 GMT [source]
Layers look great in short hair, so follow the steps below to start showing off your new hairdo. After carving the face-framing layers, if you’re struggling to refine the ends, Sara uses ARC™ Scissors 10/10 Reversible Texturizer to remove weight as needed. “I wanted the layers to float effortlessly with the rest of the cut, so I removed weight with my ARC™ Scissors to take out about 60 percent of the hair,” Sara says. Face framing layers open things up and highlight one's facial features. With most of your hair clipped back, take a moment to notice your face shape and the features you want to highlight.


Comments
Post a Comment